1、同时提交代码至GitHub和Gitee
1、输入如下命令查看当前关联的远程地址
git remote -vgit remote -v结果如下图

2、添加新的关联地址,这里新增的是Gitee
git remote add 远程库名 远程库地址
eg: git remote add gitee https://gitee.com/wkz_gitee/yian.git
git remote add 远程库名 远程库地址
eg: git remote add gitee https://gitee.com/wkz_gitee/yian.git3、再输入步骤1的命令查看,结果如下 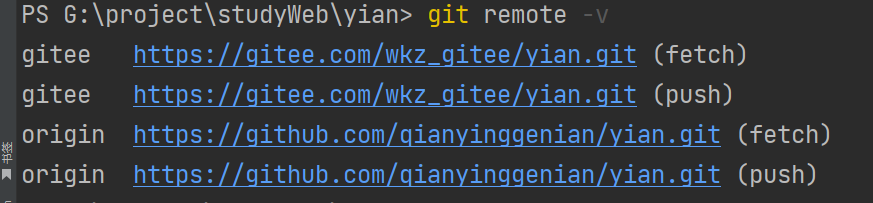 4、配置同时提交多个库命令
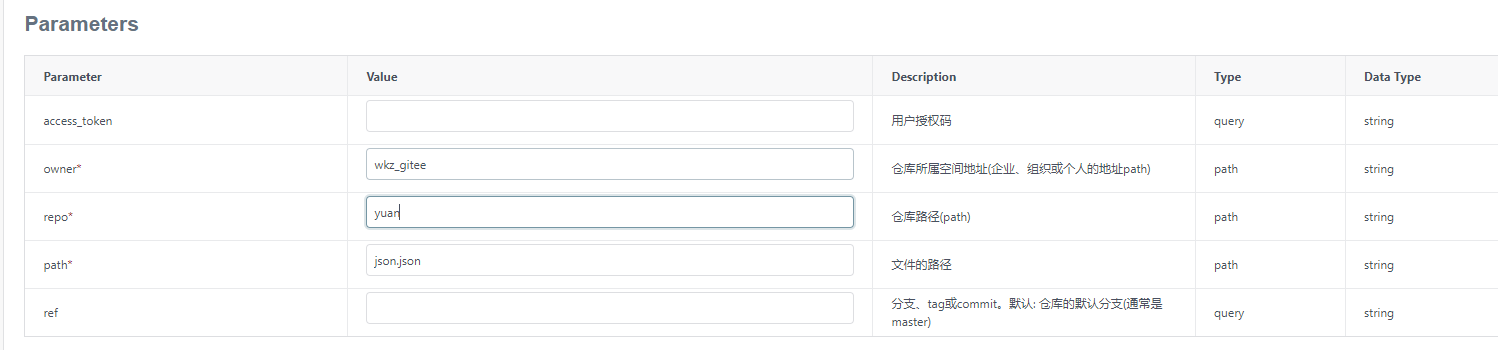
git remote set-url --add origin 你的gitee项目地址或步骤2的远程库地址git remote set-url --add origin 你的gitee项目地址或步骤2的远程库地址2、gitee 获取仓库具体路径下的内容
1、api地址:https://gitee.com/api/v5/swagger#/getV5ReposOwnerRepoContents(Path)
api:https://gitee.com/api/v5/repos/{owner}/{repo}/contents(/{path})
js
function fetchFileContent() {
      const fileUrl =  "api/v5/repos/wkz_gitee/yuan/contents/json.json";

        axios({
          method: 'get',
          timeout: 6000,
          baseURL: 'https://gitee.com/',
          responseType: 'json', // default
          url: fileUrl
        })
          .then((response) => {
            console.log('文件内容:', response.data);
            const decodedText = atob(response.data.content); // 解码得到明文
            console.log("decodedText",decodedText); // 输出结果:Hello World!
            // 这里可以对返回的文件内容进行处理
        }).catch((error) => {
          console.error('获取文件失败:', error);
        });
      }
function fetchFileContent() {
const fileUrl = "api/v5/repos/wkz_gitee/yuan/contents/json.json";
axios({
method: 'get',
timeout: 6000,
baseURL: 'https://gitee.com/',
responseType: 'json', // default
url: fileUrl
})
.then((response) => {
console.log('文件内容:', response.data);
const decodedText = atob(response.data.content); // 解码得到明文
console.log("decodedText",decodedText); // 输出结果:Hello World!
// 这里可以对返回的文件内容进行处理
}).catch((error) => {
console.error('获取文件失败:', error);
});
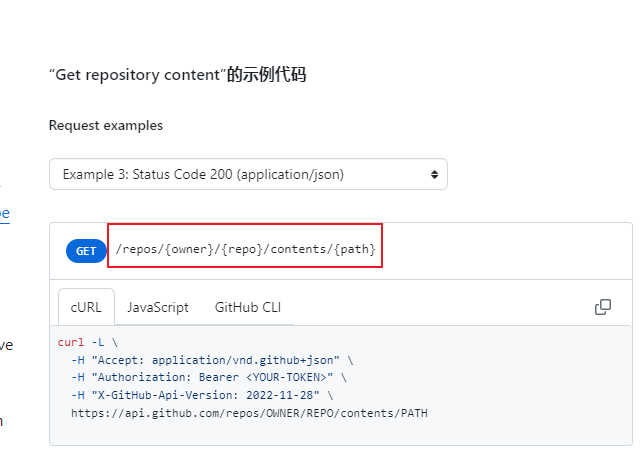
}3、github获取仓库具体路径下的内容
1、api地址:https://docs.github.com/zh/rest/repos/contents?apiVersion=2022-11-28#get-repository-content
api: https://api.github.com/repos/OWNER/REPO/contents/PATH
4、镜像源设置
1.设置淘宝镜像源:
npm config set registry https://registry.npmmirror.comnpm config set registry https://registry.npmmirror.com2.验证是否成功:
npm config get registrynpm config get registry3.输出应为:
https://registry.npmmirror.com/https://registry.npmmirror.com/4.设置官方源:
npm config set registry https://registry.npmjs.orgnpm config set registry https://registry.npmjs.org5.设置yarn镜像源:
yarn config set registry https://registry.npmmirror.comyarn config set registry https://registry.npmmirror.com6. 验证是否设置成功:
yarn config get registryyarn config get registry7.输出应为:
https://registry.npmmirror.comhttps://registry.npmmirror.com4.宝塔面板安装minio注意事项
如果出现以下错误:
安装minio
正在启动,可能需要等待1-5分钟以上...
minio_NRtc Pulling
minio_NRtc Error Get "https://registry-1.docker.io/v2/": net/http: request canceled while waiting for connection (Client.Timeout exceeded while awaiting headers)
Error response from daemon: Get "https://registry-1.docker.io/v2/": net/http: request canceled while waiting for connection (Client.Timeout exceeded while awaiting headers)
bt_failed
安装minio
正在启动,可能需要等待1-5分钟以上...
minio_NRtc Pulling
minio_NRtc Error Get "https://registry-1.docker.io/v2/": net/http: request canceled while waiting for connection (Client.Timeout exceeded while awaiting headers)
Error response from daemon: Get "https://registry-1.docker.io/v2/": net/http: request canceled while waiting for connection (Client.Timeout exceeded while awaiting headers)
bt_failed解决方法:
第一步:强制重新写入配置(腾讯云专用)
请直接复制粘贴以下整段命令(从 cat 开始到 EOF 结束),不要只打一半:
bash
sudo mkdir -p /etc/docker
sudo tee /etc/docker/daemon.json << 'EOF'
{
  "registry-mirrors": [
    "https://mirror.ccs.tencentyun.com"
  ]
}
EOF
sudo mkdir -p /etc/docker
sudo tee /etc/docker/daemon.json << 'EOF'
{
"registry-mirrors": [
"https://mirror.ccs.tencentyun.com"
]
}
EOF- 解释:这里使用
tee命令比cat更可靠,且sudo放在tee前面能确保有权限写入。
第二步:重启 Docker
bash
sudo systemctl restart dockersudo systemctl restart docker第三步:验证是否成功
bash
docker infodocker info这时候,请仔细看 Registry Mirrors 这一栏:
- ✅ 成功的样子:只有一行
https://mirror.ccs.tencentyun.com/ - ❌ 失败的样子:还是显示之前的
ustc或163地址。
如果依然失败(进阶排查)
如果执行完上面三步,docker info 依然显示旧地址,说明 Docker 读取的不是 /etc/docker/daemon.json 这个文件。
请执行以下命令查看 Docker 实际的配置文件路径:
bash
ps -ef | grep dockerdps -ef | grep dockerd看输出的最后有没有 --config-file 这个参数。
- 如果有,去修改那个参数指定的文件。
- 如果没有(通常是没有),请继续使用上面的
/etc/docker/daemon.json。
最后的大招(如果配置死活不生效):
直接使用腾讯云镜像仓库的完整镜像名进行拉取,这不需要依赖任何配置文件:
bash
# 这是 MinIO 在腾讯云镜像仓库里的“别名”
docker pull ccr.ccs.tencentyun.com/library/minio:latest
# 这是 MinIO 在腾讯云镜像仓库里的“别名”
docker pull ccr.ccs.tencentyun.com/library/minio:latest注:如果这个命令能跑通,说明网络没问题,纯粹是 Docker 的配置文件没生效。
5、腾讯云安装宝塔面板
bash
yum install -y wget && wget -O install.sh https://download.bt.cn/install/install_6.0.sh && sh install.sh ed8484becyum install -y wget && wget -O install.sh https://download.bt.cn/install/install_6.0.sh && sh install.sh ed8484bec